3.2. Python packages#
If your software of interest is available as a Python package on PyPI, you can install it using pip — Python package installer.
Note
Your software might already be available using
The quick and easy method. Search for package
names starting with python-.
In certain cases, installing packages in a virtual environment might be a better option. Read:
3.2.1. Requirements#
Python package installer (pip)#
To install pip, follow The quick and easy method for installing software.
Search and install the python3-pip package.
$HOME/.local/bin added to $PATH#
Packages that include commands will install them in the
$HOME/.local/bin directory
(What is $HOME?).
To be able to run these commands easily, you will need to
add this directory to your $PATH variable. You can
do so by following the steps in
Adding directories to PATH.
Attention
You should not add sudo in the commands below.
This method only installs files in your home directory and so does not require administrator privileges.
3.2.2. Searching for a package on PyPI#
Open PyPI website in a web browser.
In the Search projects field, enter the name of the software you would like to install and press the ENTER key or click on the search button (Fig. 54).
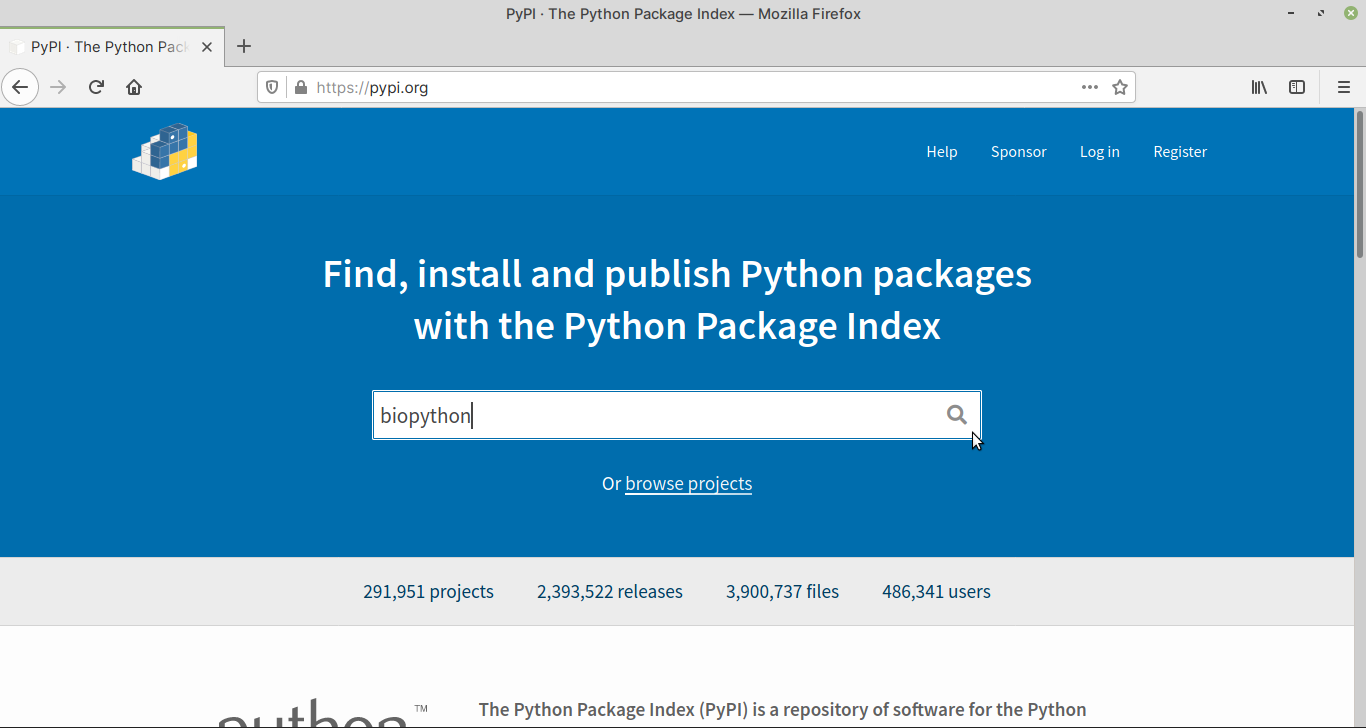
Fig. 54 Searching for a package on PyPI#
A list of packages matching the search term will be displayed (Fig. 55).
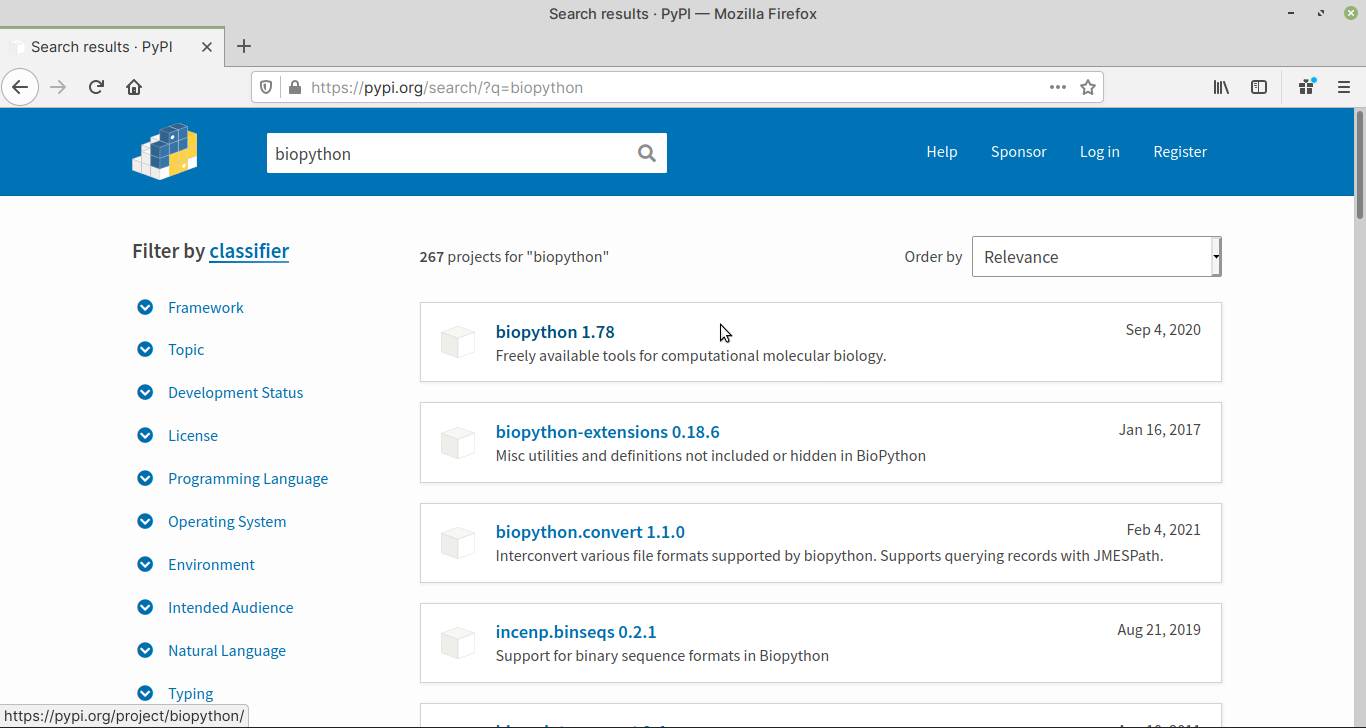
Fig. 55 Search results for biopython. 1.78 is the version number.#
Click on the result to proceed to the project description page.
In the project description page, find
the package name (Fig. 56) in the
pip install command.
In this case, it is biopython.
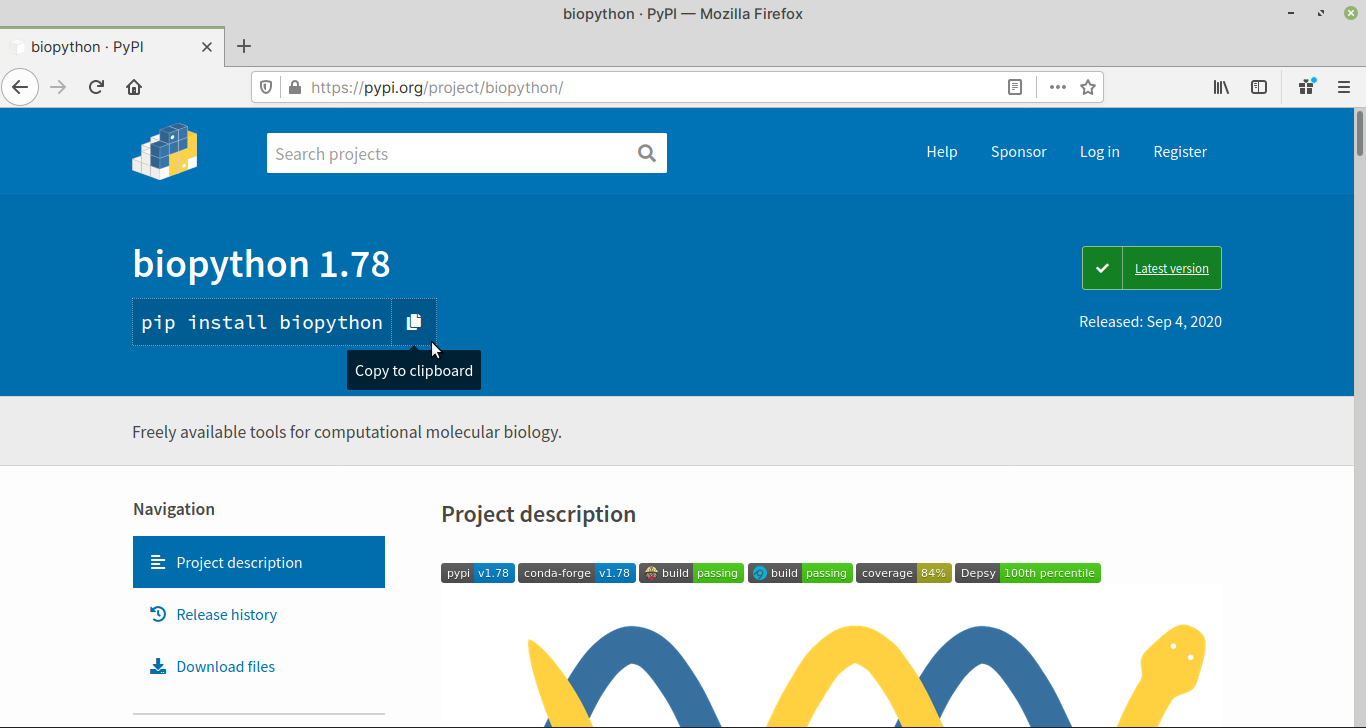
Fig. 56 Project description page for Biopython#
Note
You will need to use pip3 instead of
the pip command in the steps below.
Why?
You can now proceed towards installing the package.
3.2.3. Installing a Python package#
Open a terminal.
Use the pip3 install command with
by the name of the package, you would like to install.
Using biopython as an example:
pip3 install biopython
Output:
 Collecting biopython
  Downloading biopython-1.78-cp38-cp38-manylinux1_x86_64.whl (2.3 MB)
     |********************************| 2.3 MB 2.1 MB/s
Collecting numpy
  Downloading numpy-1.20.1-cp38-cp38-manylinux2010_x86_64.whl (15.4 MB)
     |********************************| 15.4 MB 90 kB/s
Installing collected packages: numpy, biopython
Successfully installed biopython-1.78 numpy-1.20.1
Note
One limitation of this method is that, you will not be able to install multiple versions of a package. This can be solved using a virtual environment.
3.2.4. Updating an installed package#
When you notice an update is available for the package,
you can use the install command with the -U
option, and the name of the package:
pip3 install -U biopython
3.2.5. Removing an installed package#
Use the uninstall command with the name of the
package you would like to remove:
pip3 uninstall biopython
3.2.6. Using installed packages#
Where are the files installed?#
You can use the pip3 show command with the name of the
package to identify the path where it is installed:
pip3 show biopython
Output:
Name: biopython
Version: 1.78
Summary: Freely available tools for computational molecular biology.
Home-page: https://biopython.org/
Author: The Biopython Contributors
Author-email: biopython@biopython.org
License: UNKNOWN
Location: /home/user/.local/lib/python3.8/site-packages
Requires: numpy
Required-by:
The installation path will be listed next to the
Location keyword.
Using Python packages and modules#
Python packages and modules will be installed in
$HOME/.local/lib/python3.8/site-packages.
Note
This is the path for Python 3.8.
If you have a different version of Python installed, this value will change.
This directory will be automatically included in
$PYTHONPATH. So, you can import and use installed
packages and modules in your scripts, without any extra
effort.
For example, here is a simple Python script to test BioPython installed using pip:
from Bio.Seq import Seq

seq = Seq('ATGC')
comp = seq.complement()

print(f'The complement of {seq} is {comp}')
The Bio.Seq package is part of BioPython.
Copy the code sample above and save it as
biopy_test.py. Then run it from the terminal like so:
python3 biopy_test.py
Output:
The complement of ATGC is TACG
Using included commands#
If the package includes commands, those will be
installed in $HOME/.local/bin directory. For these
commands to be easily accessible, you will
need to add this directory to PATH, as mentioned under
requirements.
As an example, when you install the Python package of
cutadapt, the cutadapt command will be installed
in $HOME/.local/bin, which you can then run from a
terminal like this:
cutadapt --version
Output:
3.1
3.2.7. Python virtual environments#
A virtual environment is a self-contained directory tree containing Python and some additional packages.
Advantages#
These are some advantages of using virtual environments.
No administrator privileges#
You do not need administrator privileges to create a virtual environment or install packages in an environment.
Multiple environments#
Multiple virtual environments can be created with each containing their own sets of packages.
These are isolated and packages in an environment can be installed, updated or removed without affecting other environments.
Creating a virtual environment#
First, using The quick and easy method, search and
install the python3-venv package. This includes the
venv module necessary for creating virtual environments.
You can create a virtual environment in any directory where you have write privileges, for example, your home directory.
To demonstrate, I will create a virtual environment called
py3env in my home directory.
python3 -m venv py3env
If successful, you will find a directory named py3env
in the current directory. No messages will be displayed.
Note
python3 is the command to run the Python 3
interpreter. Its complete path is /usr/bin/python3.
venv is the Python module to create virtual
environments.
The -m option runs the venv module as a script.
Before you can use a virtual environment, you will need to activate it.
Activating a virtual environment#
You will need to activate a virtual environment before you
can start using it. To do so, use the source command
with the path to the virtual environment’s activate
script.
For example, to activate py3env created in the
previous step, use:
source py3env/bin/activate
Your shell prompt will now change to indicate that
the virtual environment is now active.
Note the (py3env) label at the beginning of the
prompt:
(py3env) user@cookbook:~$
You can now start using this virtual environment.
Note
Before you start installing packages…
It is a good idea to install (or upgrade) Python build tools — pip, setuptools, and wheel in a new virtual environment.
These build tools are necessary for building and installing packages from PyPI and other sources.
Installing them will ensure that additional packages will build and install without errors.
Installing Python build tools#
Use pip3 install to install or upgrade the
required packages:
pip3 install -U pip setuptools wheel
The -U option of pip3 install, will upgrade
listed packages, if newer versions are available.
Output:
Collecting pip
Downloading pip-21.0.1-py3-none-any.whl (1.5 MB)
...
Installing collected packages: pip, setuptools, wheel
...
Successfully installed pip-21.0.1 setuptools-54.2.0 wheel-0.36.2
Deactivating a virtual environment#
To exit a virtual environment, use the command:
deactivate
Your shell prompt will change to its original appearance:
user@cookbook:~$
3.2.8. Notes#
You will need to update these packages manually#
Packages installed in this manner should also be updated manually.
When you notice there is an update for the package, for example, from the project’s website or from their source code repository, follow the steps in Updating an installed package to install the latest version.
Why pip3 and not pip?#
The pip package includes the following commands:
pip3— Python 3 versionpip— Python 2 version
Support for Python 2 ended in January 2020.
Since there is a possibility for both commands to exist on
a system, it is safer to use pip3 when installing
packages using this method.
What about programs written in Python 2?#
Support for Python 2 ended in January 2020.
If you do need to use a program written only in Python 2, you can create an isolated environment — either using Python venv or Conda and then install the package there.
Related sections:
When should I use a virtual environment?#
The method described here will not work if the programs you are installing require two different versions of the same package from PyPI.
In that case, you can consider creating an isolated environment — either using Python virtualenv or Conda and then installing the packages there.
Related sections:
Older versions of pip#
If the version of pip installed in your system is older than 20.0, it will attempt to install packages in system paths by default, resulting in permission denied errors.
To avoid that, you will need to add the --user option to
the install and uninstall commands, for example:
pip3 install --user biopython
A better approach is to upgrade your local version of pip.
Once upgraded, you will no longer need to user --user.
To upgrade pip, do:
pip3 install --user -U pip
You can check the installed version of pip using:
pip3 -V
Comments